

PAPER TRAY ORGANIZER
- Feb 5, 2017
- 4 min read
Abstract
The Paper Tray Desk Organizer eliminates paper-mounds and puts clutter into neat slots to maximize efficiency in any office or personal space. The Paper Tray Organizer was designed considering woodworking techniques and function. The design creates a functional tool that allows for easy organizing and use. The semi-circle slots allow for grabbing paper’s easily. The set-back sides allow for papers to be easily added and removed in addition to easy view while in the tray. Originally, the Paper Tray Organizer was created to be used as a functional and aesthetic way to keep track of all the papers at the boss’s desk. I spent a weekend designing and creating. In the end, I brought the Paper Tray Organizer to the office on Monday and my boss loved it. He has never been more on top of things around the office.
Background
As told by Lee Breece
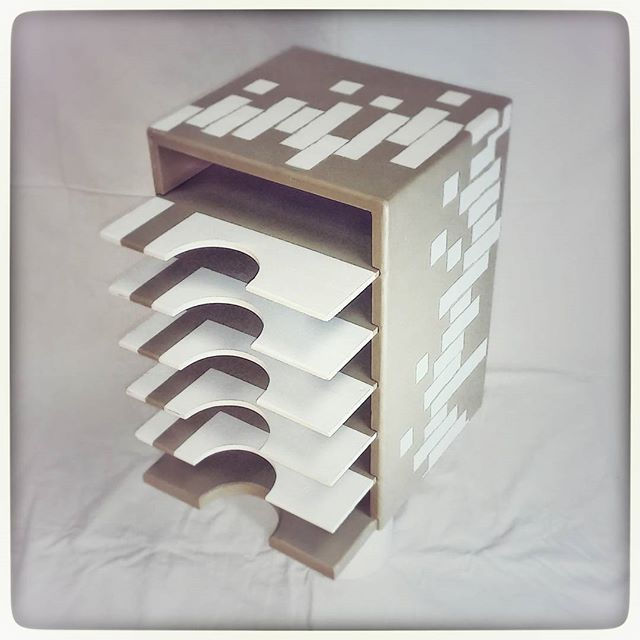
Paper Tray as designed by This Woodwork

There has always been a need for something to organize all of the loose paper in our lives. Growing up, paper became the number one clutter in my life. School papers, mail, college letters, awards, catalogs, the list is endless for all the junk we accumulate in our lives. This paper tray design has developed over my childhood and into my late schooling years. I looked and found designs online and have since created my own after building different the designs and toying around with different features. The first design I found online that I made was from This Woodwork. I found it in a video on YouTube. I then tried to create a design of my own based off the one in the video. Once it was complete, I used it on the desk in my room for school papers and miscellaneous papers that I had. It quickly filled up, and I grew out of my desk. Once I had a new desk setup, I messed around on CAD and came up with a design similar to the final Paper Tray Organizer design. After making more prototypes, I finally settled on the design as it is now. It has worked out great.
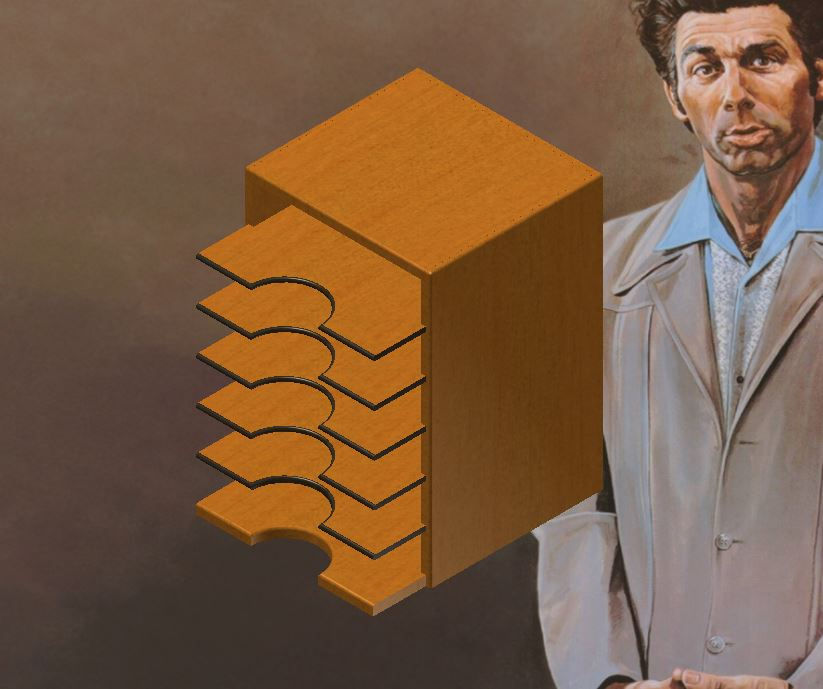
Final Paper Tray Design in CAD
Design
As in all great design, the goal is to maximize function in the design, while also coming off as aesthetically pleasing. One of the most annoying things about paper trays in school is that the tray is submerged into the case and the paper is not visible and often forgotten. The other issue is that paper is difficult to pull out. Paper always gets stuck on the front edge of the tray and friction holds the paper in place and makes it impossible to grab. I understand why the tray is submerged into case, so that any misalignment of the trays is unnoticeable, but what I don’t understand is why it is submerged rather than offset from the case. I designed my paper tray with the trays offset from the front so that any paper in the tray is easily visible. The trays are sturdy enough because there are made out of solid wood or plywood that they don’t need a front edge to reinforce the tray. There’s a dado in the back in addition to the sides to give the trays strength as well. Therefore, paper will never get stuck on a front edge because there isn’t one. For easy removal, a semi-circle is cut into the tray, preventing friction from holding on to a paper. The ‘cubby’ design to the paper tray was kept because straight lines are more aesthetically pleasing and serve more of a function than an artistic model would.
Construction
This section serves a quick overview of the building instructions.
SAFETY
Knowledge of proper techniques is paramount in this project to prevent injuries from kickback on the table saw. Although the dados and rabbits are cut on the table saw, they are cut using a cross-cut sled. Never crosscut a board on a table saw without a crosscut sled. General rule of thumb is that never cut a board against the fence with its short side against the fence. This project is very simple but it is recommended that this isn’t your first woodworking project, and have prior experience to cutting rabbits and dados.
CONSTRUCTION
My paper tray was made using solid wood—even the trays. All the dimensions are designed so that the wood fits in a 12.5” planer. I mass-produce the trays with high-quality plywood. All the pieces are cut to length, with pieces of the same dimension cut at the same time. The dados are all cut at the same time with the same dimensions. Because I don’t have a crosscut sled for my dado stack, I just used the saw blade and made multiple cuts until I have the width I need. The key to keeping things precise is that everything is marked and never estimated. I used a stop block and cut all of the dados on the sides and the back at the same time. If you’re painting the tray, cut the dados very loose, as paint and primer will thicken the trays significantly.

To attach all the pieces, I just used glue and clamps. Nails, screws, brad-nailer, etc. would all work fine. I didn’t want to take the time and deal with holes from using nails or screws.
To cut the semi-circles in the trays and bottom, I used the bandsaw and the orbital disk-sander. This operation could easily be done with a coping saw or a hole cutter on a drill press. Just drill the circle before you cut the piece to its final dimension, cutting a hole a little more than a semi-circle, so that you can use the drill bit on the hole cutter as guide rather than trying to free-hand a semi-circle. I cut the trays to their final dimensions last anyway because the exact width the trays need to be isn’t always the width in the plans.
Build
Purchase $10 plans on Breece Woodworking’s Etsy shop:
https://www.etsy.com/shop/BreeceWoodworking
Plans come with complete CAD drawings and building instructions that take you step by step.
Feel free to send comments or ask questions by emailing Breece Woodworking at breecewoodworking@gmail.com
![endif]--![endif]--


Comments